Antique Hutch
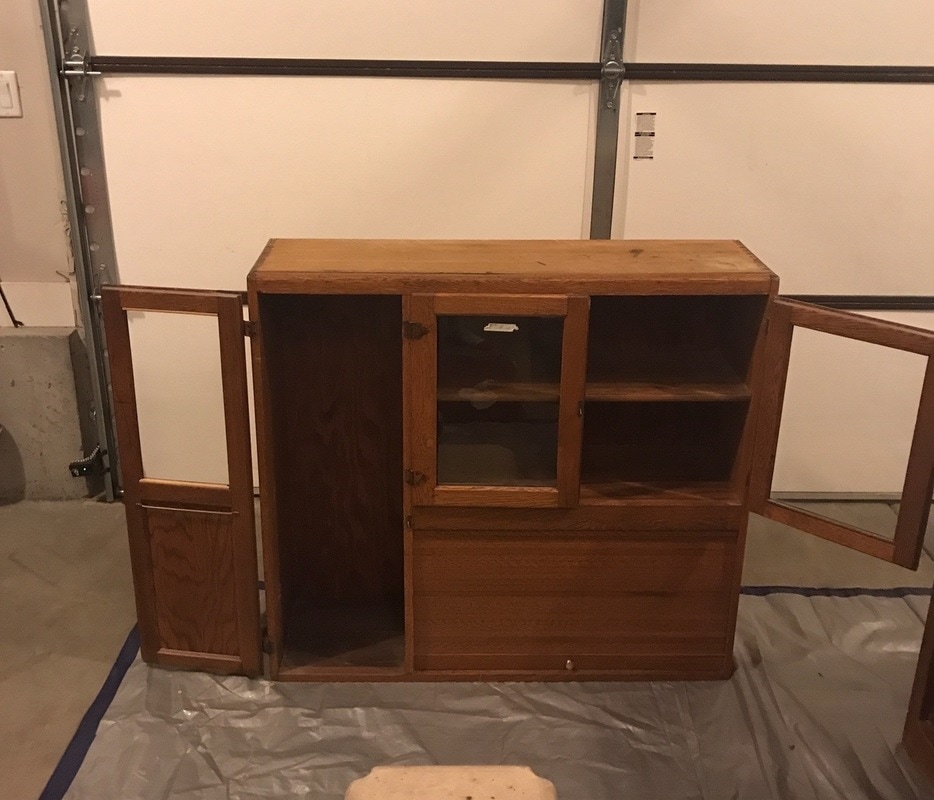
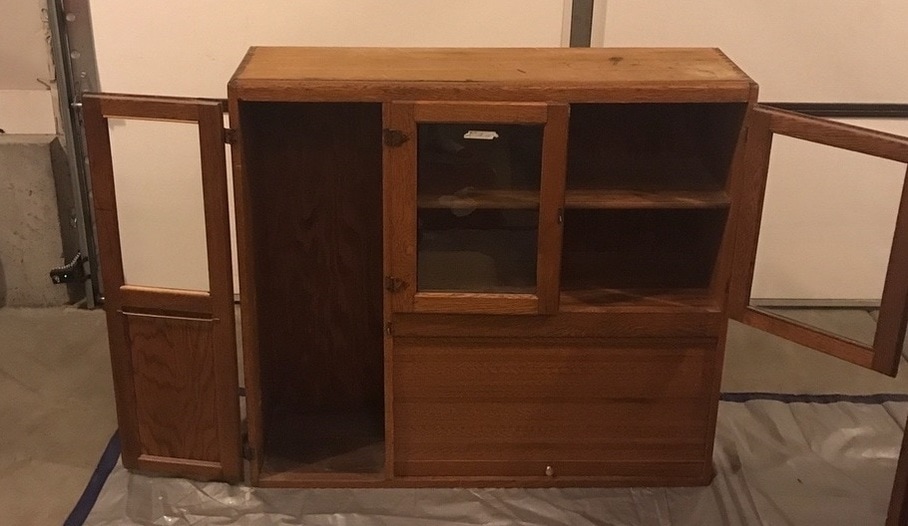
This antique kitchen hutch was given to me by mom! It was the first piece of furniture that her and my dad ever bought, so she decided to hand it on down to me.
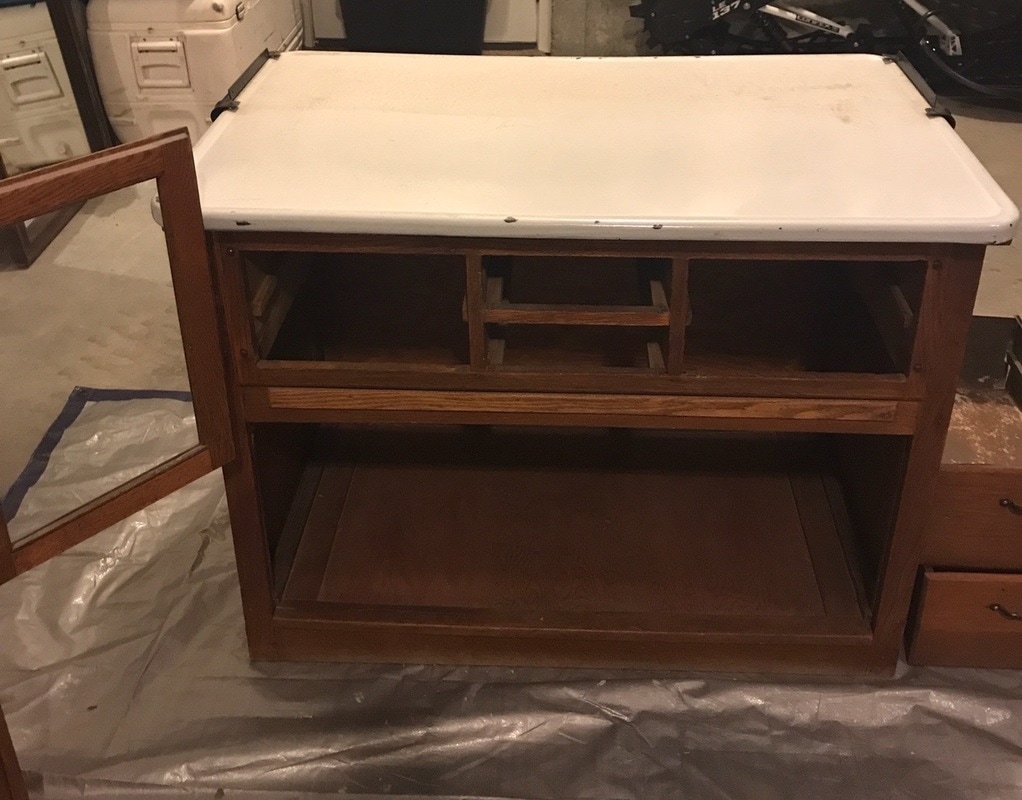
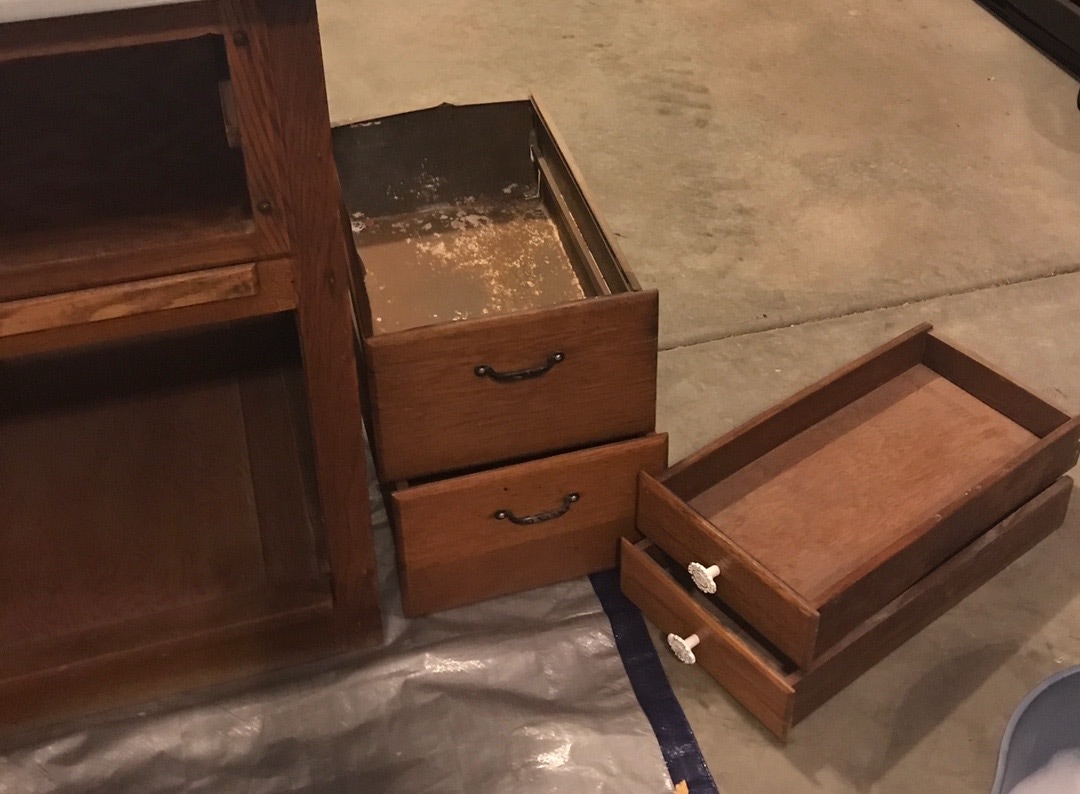
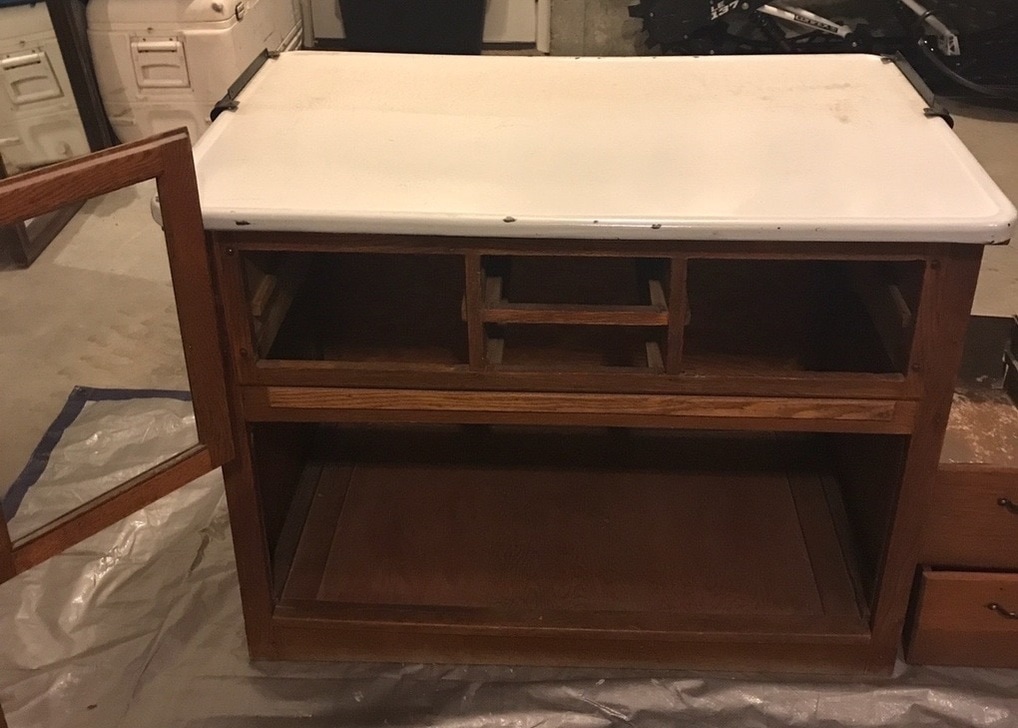
Since it is well over 100 years old, it was pretty beat up and need some TLC. I started by separating the two pieces and removing all of the drawers. I then thoroughly cleaned it, first by dusting it off and then used dish soap and a wet wash cloth.
Since it is well over 100 years old, it was pretty beat up and need some TLC. I started by separating the two pieces and removing all of the drawers. I then thoroughly cleaned it, first by dusting it off and then used dish soap and a wet wash cloth.
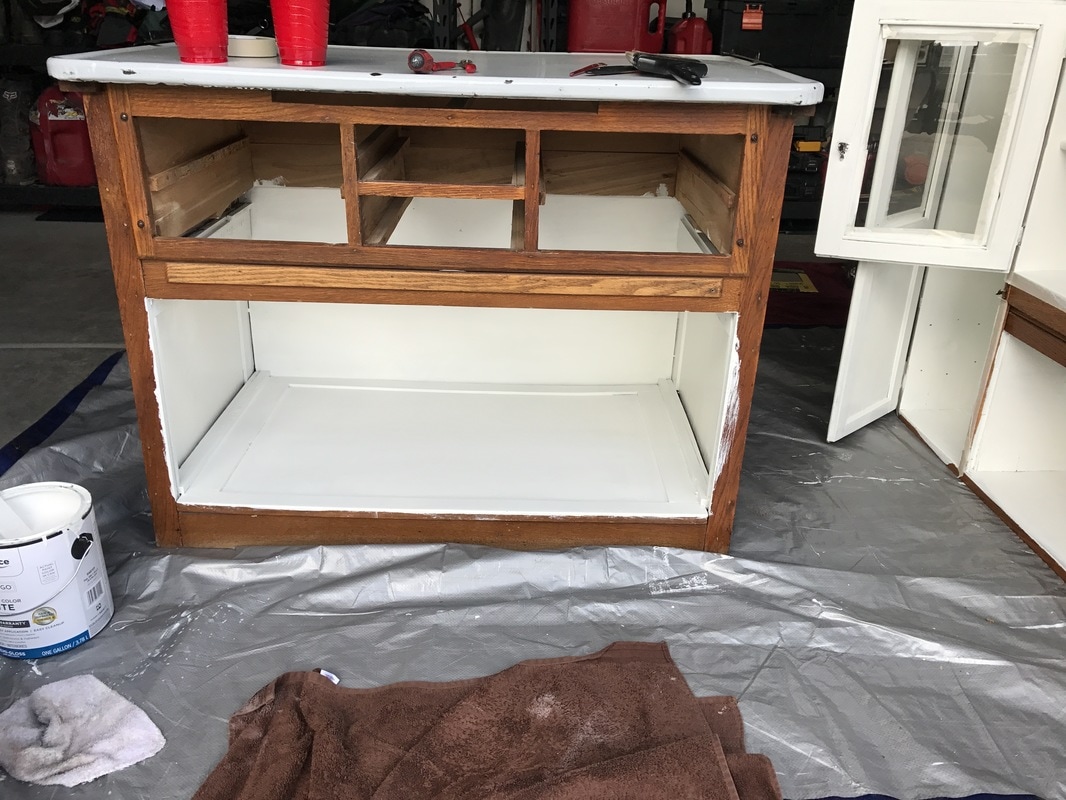
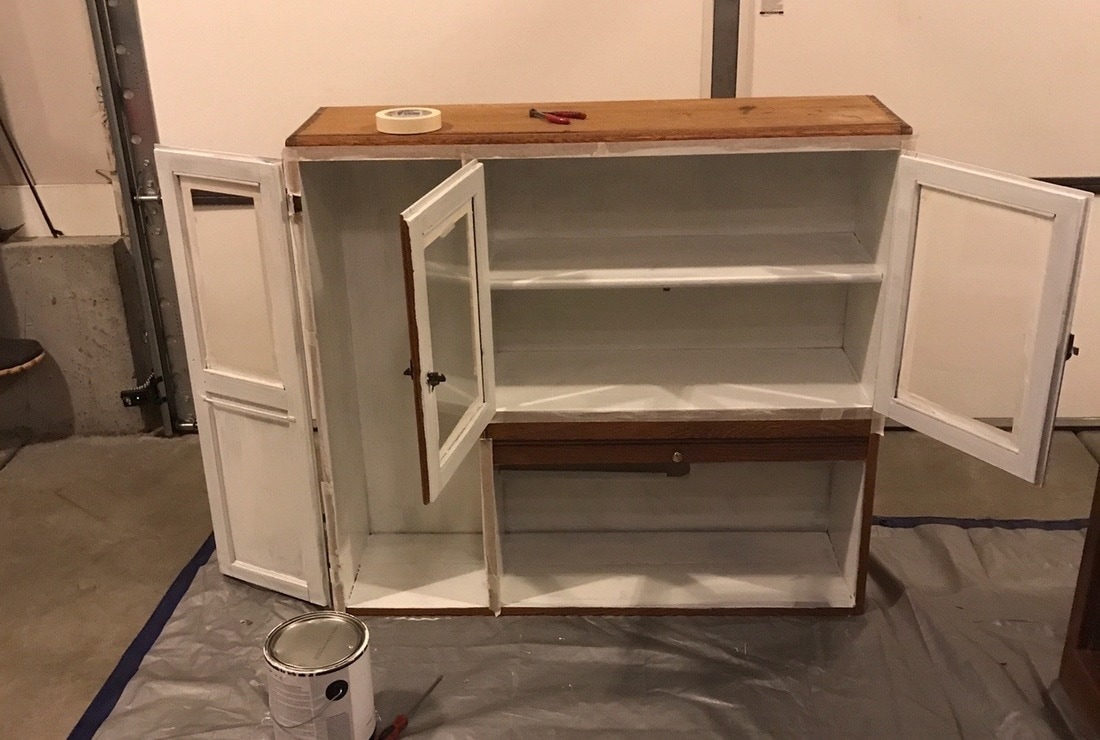
I began by painted the insides of the cabinet white. I chose white so that the inside was very soft and allowed any of the decorative items placed inside to pop!
Using just classic white paint, it took 3 coats to make sure that everything was covered correctly. I allowed them to dry over night.
Using just classic white paint, it took 3 coats to make sure that everything was covered correctly. I allowed them to dry over night.

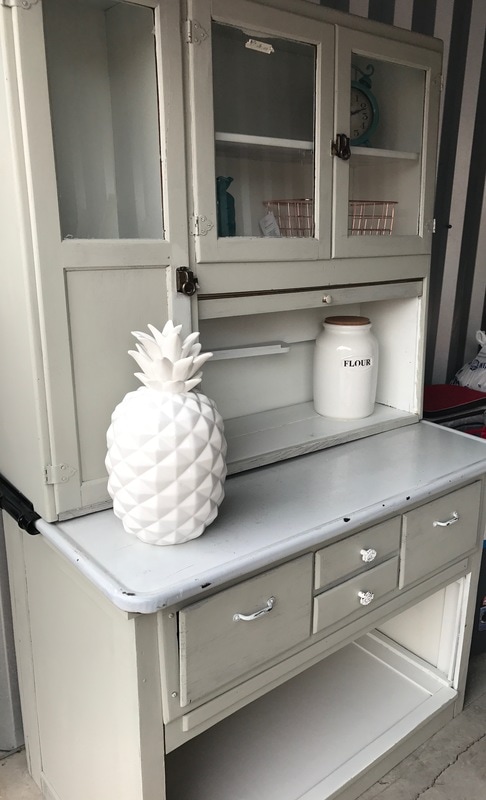
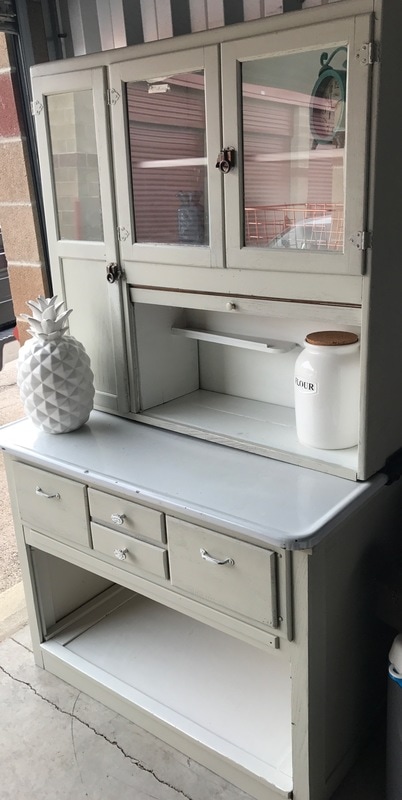
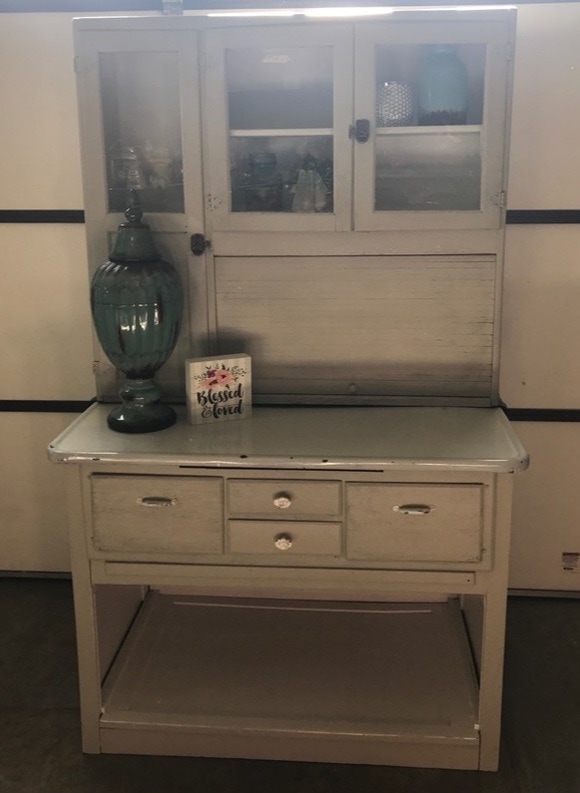
I painted the outside a very light grey. I left the tin top the chippy white to keep some of it's original character.
I intended to keep all of the original hardware, but some handles needed to be replaced. So went with some chic white handles that were lightly chipped.
I intended to keep all of the original hardware, but some handles needed to be replaced. So went with some chic white handles that were lightly chipped.
|
|
The transformation of this hutch was awesome!
It was roughly a 2 day process, and I think the light grey is such a versatile color!
It was roughly a 2 day process, and I think the light grey is such a versatile color!
